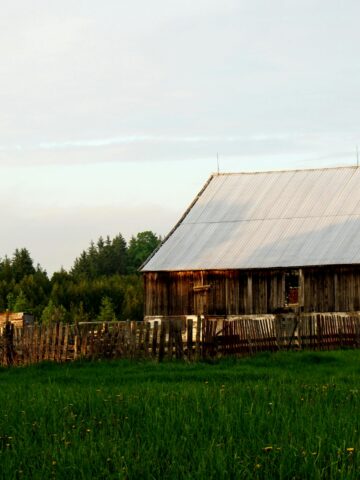
Cheesemaking at home starts the same way many homestead skills do with fresh milk, a simple pot, and the willingness to try. No factory. No mystery ingredients. Just milk, time, and a little patience.

If you’ve ever looked at a gallon of milk and thought, “I wish I knew how to turn this into something more,” this guide is for you. You don’t need a commercial dairy, stainless steel vats, or fancy presses. Cheesemaking at home can be simple, affordable, and incredibly rewarding especially on the homestead.
Let’s walk through it together, one step at a time.
My sourdough was flat and business was slow

When I first started homesteading, my sourdough was dense and flat, my garden struggled, and it seemed like I was scrambling to get people to notice my business, let alone, buy my products. And for a time, I burnt out.
After years of trial and error, analyzing hundreds of businesses from other sectors, and just pure grit...
I created a free Zero to Homestead Skool Community: a place where homesteaders of all levels share wins, troubleshoot challenges, and get guidance from experienced peers. By joining, you’ll access step-by-step guides to build traditional skills (sourdough, fresh milled flour, traditional foods, preserving, livestock, gardening, and more) plus full courses, workshops, and homestead business-building resources with a supportive network to help your homestead thrive.
Why Cheesemaking Belongs on the Homestead
Cheesemaking is one of those old skills that feels intimidating… until you actually do it.
For homesteaders, it makes sense because it stretches your milk supply, preserves excess milk, reduces waste, and builds confidence in traditional food skills. And maybe most importantly it reconnects you to your food in a very real way. Your first cheese doesn’t have to be perfect. It just has to be yours.
What You Really Need to Make Cheese at Home
Let’s clear something up right away: you do not need a fancy setup.
Here’s what most beginner homesteaders start with:
Basic Cheesemaking Supplies
- A large non-reactive pot (stainless steel or enamel)
- A thermometer (digital or analog)
- Cheesecloth or a clean flour sack towel
- A colander
- A slotted spoon
- A large bowl
That’s it.
No cheese press. No aging cave. No $300 kit. You can make your first cheese with what you already have in your kitchen.
Choosing the Best Milk for Homemade Cheese
Milk is the heart of cheesemaking, and it’s also where most beginners run into trouble.
Best Options for Beginners:
- Fresh raw milk (cow or goat) is ideal if you have access
- Low-temperature pasteurized milk from a local dairy
What to Avoid:
- Ultra-pasteurized (UHT) milk
- Shelf-stable milk
If you’re buying from the grocery store, look for milk labeled “pasteurized” but not ultra-pasteurized. This one detail can make or break your cheese. If you'd like to learn more about drinking and using raw milk, check out my guide here.

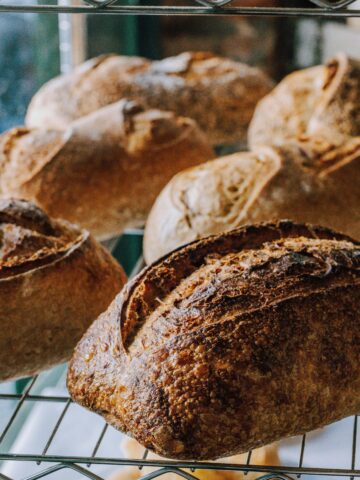
The Easiest Cheese to Make at Home (Perfect for Beginners)
If you’re brand new, start with a simple fresh cheese. Fresh cheeses don’t require aging, pressing, or special cultures. You can make them in an afternoon.
Beginner-Friendly Cheeses:
- Farmhouse cheese
- Paneer
- Queso fresco
- Simple ricotta-style cheese
I also have beginner friendly recipes for the instant pot including cheddar cheese and mozzarella cheese.
These cheeses teach you the fundamentals of heating milk, curdling, draining, and salting. Once you’ve made one successfully, everything else feels far less intimidating.
A Simple Beginner Cheesemaking Process
Here’s the basic flow most fresh cheeses follow:
- Heat the milk slowly
Low and slow prevents scorching and helps curds form properly. - Add your acid or culture
This could be vinegar, lemon juice, or starter culture depending on the recipe. - Wait for the curd to form
This is where the magic happens. Milk separates into curds and whey. - Cut and drain the curds
The curds become your cheese. The whey is liquid gold: don’t dump it! - Salt and enjoy
Fresh cheese can be eaten right away or refrigerated for later.
Simple. Old-fashioned. Satisfying.
Common Cheesemaking Mistakes (And How to Avoid Them)
Every homesteader has a “first cheese flop” story and that’s okay.
Here are a few common beginner mistakes:
- Milk won’t set → Check your milk type and temperature
- Rubbery texture → Milk was overheated
- Crumbly cheese → Too much acid added
- Bitter taste → Overheating or low-quality milk
Cheesemaking is part science, part intuition. The more you practice, the more you’ll feel when something is right.
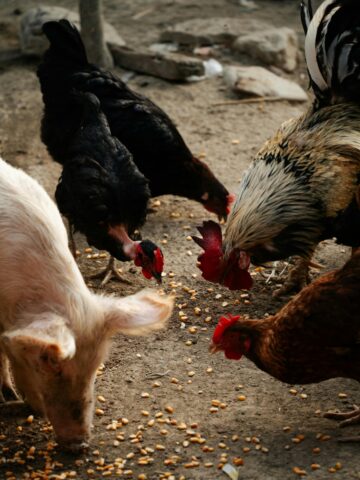
What to Do With Leftover Whey
Please don’t pour that whey down the drain.
On the homestead, whey is a resource:
- Feed it to chickens or pigs
- Use it in bread, biscuits, or soaking grains
- Add it to the garden or compost
- Use it for fermenting vegetables
One batch of cheese often creates more opportunities than you expect.

Is Cheesemaking Worth It for Homesteaders?
Short answer? Yes.
Long answer? Cheesemaking builds confidence. It teaches patience. It helps you slow down and work with your hands. And it turns a simple ingredient into something nourishing and deeply personal.
Your first cheese might not look like a store-bought block, but it will taste like accomplishment.
Ready to Learn Cheesemaking Alongside Other Homesteaders?
Cheesemaking is easier (and more fun) when you’re not doing it alone.
If you want step-by-step beginner recipes, troubleshooting help, encouragement from other homesteaders, and a place to ask questions without feeling silly: Join my Skool community, where we’re learning traditional homestead skills together one batch, one loaf, one jar at a time.
Come share your first cheese (or your first failure). You’ll be right at home.

Hi, I’m Victoria!
I document our homesteading journey on YouTube: covering sourdough, fresh milled bread, gardening, and simple living. Click here to watch, learn, and be inspired to start your own homestead at home.

Comments
No Comments