Before the first jar ever seals with its familiar pop, learning the difference between water bath canning and pressure canning lays the foundation for a safe, well-stocked pantry and a season of confident home food preservation. Canning is one of those timeless homestead skills that turns summer abundance into winter security, and at the heart of it all are two trusted methods: water bath canning and pressure canning.

If you’re new to preserving, or even if you’ve been at it a while, understanding when and how to use each method is essential for both safety and success. Let’s walk through the differences in a simple, warm, step-by-step way, just like it would be taught in a country kitchen.
My sourdough was flat and business was slow

When I first started homesteading, my sourdough was dense and flat, my garden struggled, and it seemed like I was scrambling to get people to notice my business, let alone, buy my products. And for a time, I burnt out.
After years of trial and error, analyzing hundreds of businesses from other sectors, and just pure grit...
I created a free Zero to Homestead Skool Community: a place where homesteaders of all levels share wins, troubleshoot challenges, and get guidance from experienced peers. By joining, you’ll access step-by-step guides to build traditional skills (sourdough, fresh milled flour, traditional foods, preserving, livestock, gardening, and more) plus full courses, workshops, and homestead business-building resources with a supportive network to help your homestead thrive.
Why There Are Two Canning Methods
The difference between water bath and pressure canning comes down to acidity and temperature.
- High-acid foods can be safely preserved with boiling water.
- Low-acid foods require higher temperatures to prevent botulism and must be pressure canned.
That’s why these two methods exist and why choosing the right one matters so much.
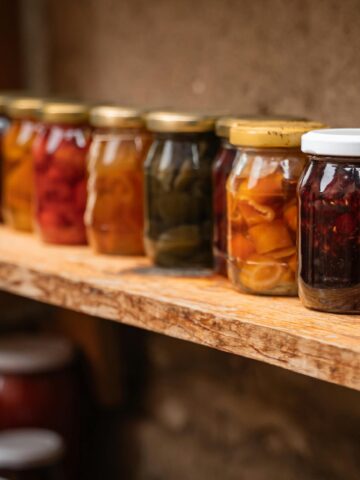
Water Bath Canning (For High-Acid Foods)
Best For:
- Jams & jellies
- Pickles & relishes
- Tomatoes (with added acid)
- Fruit
- Applesauce
- Salsa (tested recipes only)
How It Works
Water bath canning uses boiling water (212°F / 100°C) to destroy spoilage organisms in acidic foods.
Step-by-Step Water Bath Canning
- Prepare Your Jars
Wash jars, lids, and bands. Keep jars hot. - Fill with Hot Food
Ladle prepared recipe into jars, leaving proper headspace. - Remove Air Bubbles
Slide a bubble remover along the inside. - Wipe Rims & Apply Lids
Clean rims, add lids, screw bands fingertip-tight. - Process in Boiling Water
Submerge jars fully, boil for the tested time. - Cool & Seal
Remove and let rest 12–24 hours. Check seals.

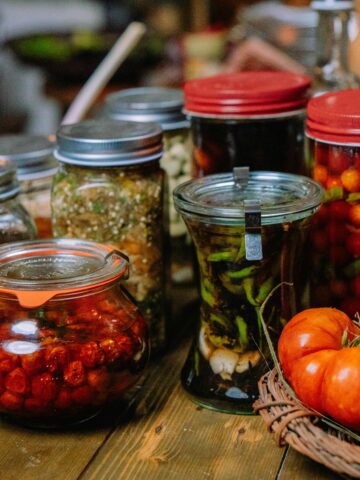
Pressure Canning (For Low-Acid Foods)
Best For:
- Green beans
- Corn
- Potatoes
- Carrots
- Meats
- Broth & stock
- Chili & soups
- All plain vegetables
How It Works
Pressure canners reach 240°F (116°C), hot enough to destroy botulism spores that boiling water cannot.
Step-by-Step Pressure Canning
- Prepare Jars & Food
Hot jars, hot food, correct headspace. - Load the Canner
Add water, place jars on rack. - Vent Steam
Bring to boil, vent steam 10 minutes. - Build Pressure
Apply weight or close valve. Reach required PSI. - Process
Maintain steady pressure for the full time. - Cool Naturally
Turn off heat, allow pressure to return to zero on its own. - Remove & Seal
Let jars cool 12–24 hours, then check seals.
Water Bath vs Pressure Canning: At a Glance
| Feature | Water Bath | Pressure Canning |
|---|---|---|
| Best For | High-acid foods | Low-acid foods |
| Temp | 212°F | 240°F |
| Equipment | Large pot with rack | Pressure canner |
| Safety | Acid prevents botulism | Heat destroys botulism |
| Skill Level | Beginner friendly | Intermediate but learnable |
A Note on Safety (The Heart of Preservation)
Canning isn’t just tradition. It’s science passed down through generations. Always:
- Use tested recipes
- Follow exact processing times
- Adjust for altitude
- Never substitute methods
Your jars hold food, but they also hold trust. Respecting the process keeps your pantry safe and your family nourished.

A Skill Worth Learning Well
Whether you’re boiling peaches in August or pressure canning broth on a snowy afternoon, both methods have their place in a well-stocked homestead kitchen. Water bath canning preserves the sweetness of summer fruits, while pressure canning builds shelves of hearty, ready-to-eat meals.
Together, they form the backbone of true food security: the quiet kind that comes from knowing you can feed your family no matter the season.
Once you learn both, you don’t just store food…
You store peace of mind.
If you’re ready to go beyond the basics and truly master safe, confident home canning, I’d love to invite you into my Skool community. Inside, you’ll find step-by-step tutorials, seasonal canning classes, printable guides, and a supportive group of homesteaders preserving food the traditional way. Join us and build a pantry that brings peace of mind, nourishment, and old-fashioned self-reliance one jar at a time.
Comments
No Comments